

How to build a To Do List with Phoenix LiveView
Over the last few years, interest in Elixir and its Phoenix framework has been growing. This programming language runs on the Erlang Virtual Machine, known for being natively concurrent, fault-tolerant and distributed.
We'll use Phoenix and the LiveView library to build a simple To Do List.
Over the last few years, interest in Elixir and its Phoenix framework has been growing. This programming language runs on the Erlang Virtual Machine, known for being natively concurrent, fault-tolerant and distributed.
We'll use Phoenix and the LiveView library to build a simple To Do List.


- Prerequisites
- Creating the project
- Creating the model
- Creating the LiveView component
- Displaying the list
- Adding a completion status
- Changing the completion status
- Creating a new item
- Deleting an item from the list
- Editing an item
- Filtering list items
- Reordering items
- Refactor: reusing components
- PubSub
- Conclusions
- External references
Prerequisites
For this guide you need to have the following installed on your computer:
- Mix;
- Elixir;
- Phoenix;
- Postgres.
Creating the project
To get started, let's create the project with the command:
mix phx.new todo_app --live
The --live flag tells the generator to include Phoenix.LiveView in the project. Let's move into the new folder and follow the steps shown at the end of the installation, creating the database and starting the server to check that everything so far has worked.
Creating the model
The information we receive from the user will be saved in the database.
Now let's create the Todo table with a migration:
mix phx.gen.context Todos Todo todos title:string
Creating the LiveView component
In this step we'll create the component that lets us view all tasks, create new ones or delete them.
Let's create the new file:
# lib/todo_app_web/live/todo_live.ex
defmodule TodoAppWeb.TodoLive do
use TodoAppWeb, :live_view
def mount(_params, _session, socket) do
{:ok, socket}
end
def render(assigns) do
~L"""
<h1>Hello World!</h1>
"""
end
endLet's update the router as follows:
# scope "/", TodoAppWeb do pipe_through :browser # live "/", PageLive, :index live "/", TodoLive end
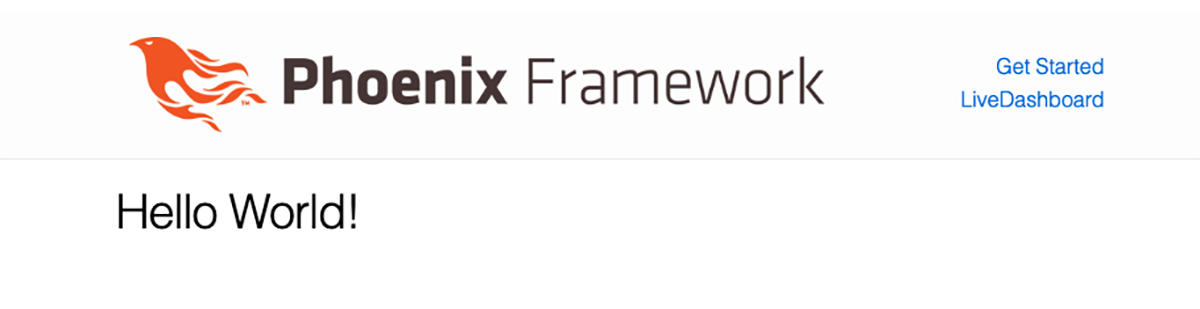
Back in the browser, you should see this screen:

Displaying the list
Let's start by creating a few items to display later. From the terminal, run:
$ iex -S mix
> alias TodoApp.Todos
TodoApp.Todos
> Todos.create_todo(%{title: "First todo"})
[debug] QUERY OK db=4.0ms decode=1.4ms queue=2.0ms idle=652.3ms
INSERT INTO "todos" ("title","inserted_at","updated_at") VALUES ($1,$2,$3) RETURNING "id" ["First todo", ~N[2021-07-09 10:45:00], ~N[2021-07-09 10:45:00]]
{:ok,
 %TodoApp.Todos.Todo{
   __meta__: #Ecto.Schema.Metadata<:loaded, "todos">,
   id: 1,
   inserted_at: ~N[2021-07-09 10:45:00],
   title: "First todo",
   updated_at: ~N[2021-07-09 10:45:00]
 }}
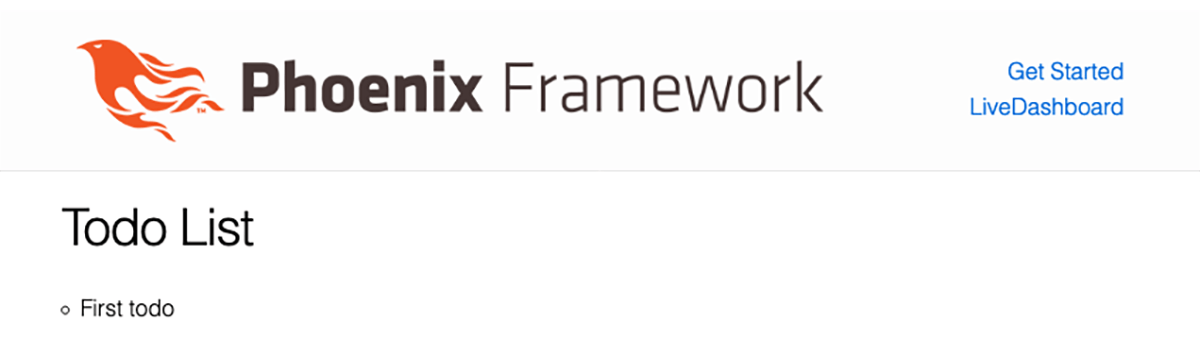
Let's update the TodoLive component as follows:
# lib/todo_app_web/live/todo_live.ex
defmodule TodoAppWeb.TodoLive do
use TodoAppWeb, :live_view
alias TodoApp.Todos
def mount(_params, _session, socket) do
{:ok, fetch(socket)}
end
def render(assigns) do
~L"""
<h1>Todo List</h1>
<ul>
<%= for todo <- @todos do %>
<li><%= todo.title %></li>
<% end %>
</ul>
"""
end
defp fetch(socket) do
assign(socket, %{todos: Todos.list_todos()})
end
endLet's look at the changes in detail:
- With
aliaswe create a shortcut for theTodoApp.Todosmodule, so we only need to writeTodos; - The
fetchfunction assigns to the socket a collection whose key istodosand whose value is the list of all items. This makes the following variable available inside the render function:@todos.

Adding a completion status
In this step we want to be able to check off a list item to mark the task as done.
First, we need to add the following attribute to the Todo table: completed.
$ mix ecto.gen.migration AddCompletedToTodos
Let's open the new file and add the new attribute:
defmodule TodoApp.Repo.Migrations.AddCompletedToTodos do use Ecto.Migration def change do alter table(:todos) do add :completed, :boolean, default: false end end end
Run the migration with the command mix ecto.migrate. Next, we need to update the Todo changeset and schema:
# lib/todo_app/todos/todo.ex defmodule TodoApp.Todos.Todo do # ... schema "todos" do ... field :completed, :boolean ... end # ... def changeset(todo, attrs) do # ... |> cast(attrs, [:title, :completed]) # ... end end
We can see the new attribute in the terminal:
$ iex -S mix
> alias TodoApp.Todos
TodoApp.Todos
> Todos.get_todo!(1)
[debug] QUERY OK source="todos" db=6.2ms idle=1626.5ms
SELECT t0."id", t0."title", t0."completed", t0."inserted_at", t0."updated_at" FROM "todos" AS t0 WHERE (t0."id" = $1) [1]
%TodoApp.Todos.Todo{
  __meta__: #Ecto.Schema.Metadata<:loaded, "todos">,
  completed: false,
  id: 1,
  inserted_at: ~N[2021-07-09 11:05:48],
  title: "First todo",
  updated_at: ~N[2021-07-09 11:05:48]
}
Changing the completion status
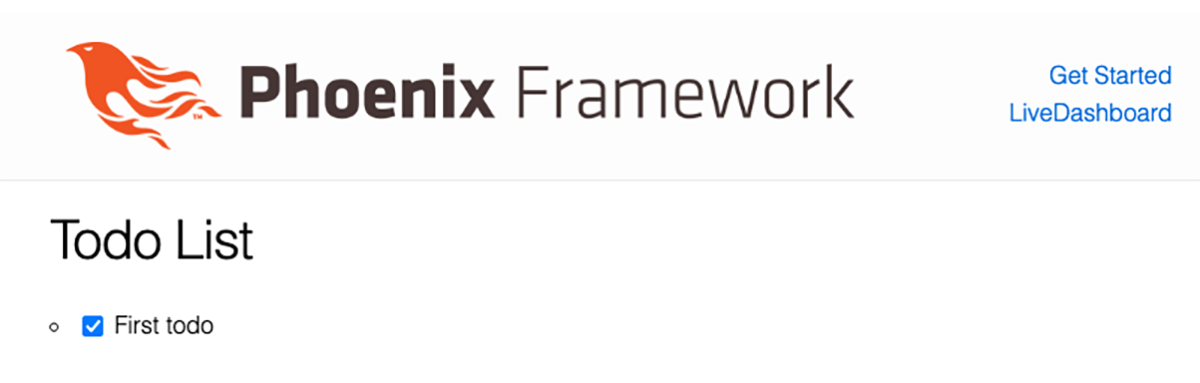
Now we want the app to show a checkbox for changing the completed attribute of each todo. Let's update the TodoLive component as follows:
# lib/todo_app_web/live/todo_live.ex
defmodule TodoAppWeb.TodoLive do
...
def render(assigns) do
~L"""
<h1>Todo List</h1>
<ul>
<%= for todo <- @todos do %>
<li>
<%= content_tag :input,
nil,
type: 'checkbox',
phx_click: 'toggle-todo',
phx_value_todo_id: todo.id,
checked: todo.completed %>
<%= todo.title %>
</li>
<% end %>
</ul>
"""
end
def handle_event("toggle-todo", %{"todo-id" => id}, socket) do
todo = Todos.get_todo!(id)
{:ok, _} = Todos.update_todo(todo, %{completed: !todo.completed})
{:noreply, socket}
end
...
endLet's look at the checkbox input. As you can see, we added two attributes to the node: phx_click and phx_value_todo_id. The first means that clicking the element calls the handler toggle-todo. The second is used to pass a Map with the key todo_id to the handle_event function, with the todo's id as its value.
The handle_event function takes the event name, a Map and the socket as parameters. Here, the handler's job is to fetch the todo and update its attribute completed.

Creating a new item
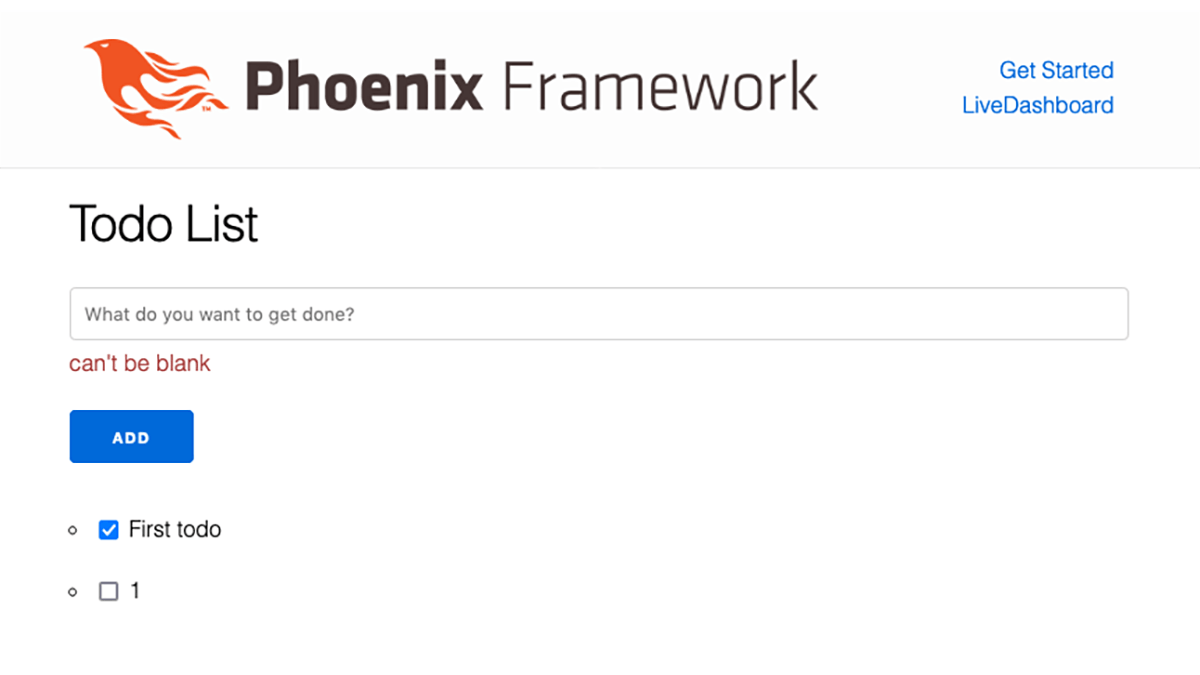
In this section we'll add a form to create a new todo and show it in the list. Let's update the TodoLive component as follows:
# lib/todo_app_web/live/todo_live.ex
defmodule TodoAppWeb.TodoLive do
def render(assigns) do
~L"""
...
<%= form_for @changeset,
'#',
[
id: 'todo-form',
phx_submit: 'add-todo',
phx_change: 'validate'
], fn f -> %>
<%= text_input :todo,
:title,
placeholder: 'Create a todo' %>
<%= error_tag f, :title %>
<%= submit 'Add', phx_disable_with: 'Adding...' %>
<% end %>
...
"""
end
# ...
def handle_event("add-todo", %{"todo" => params}, socket) do
case Todos.create_todo(params) do
{:ok, _todo} ->
{:noreply, fetch(socket)}
{:error, %Ecto.Changeset{} = changeset} ->
{:noreply, assign(socket, changeset: changeset)}
end
end
def handle_event("validate", %{"todo" => params}, socket) do
changeset =
%TodoApp.Todos.Todo{}
|> Todos.change_todo(params)
|> Map.put(:action, :validate)
{:noreply, assign(socket, changeset: changeset)}
end
defp fetch(socket) do
socket
|> assign(:changeset, Todos.change_todo(%TodoApp.Todos.Todo{}))
|> assign(:todos, Todos.list_todos())
end
end
Note that the form has phx_submit and phx_change. The first calls the handler add-todo when you hit submit, while the handler validate is called on every form change.
The add-todo handler creates the new task from the parameters received from the form. If creation succeeds, the socket is updated with the list of all values, including the new one. Otherwise, the changeset containing the errors is assigned to the socket. For example:
#Ecto.Changeset<action: :insert, changes: %{}, errors: [title: {"can't be blank", [validation: :required]}], data: #TodoApp.Todos.Todo<>, valid?: false>The validate handler checks on every input change that the value is valid, that is, not an empty string.

Deleting an item from the list
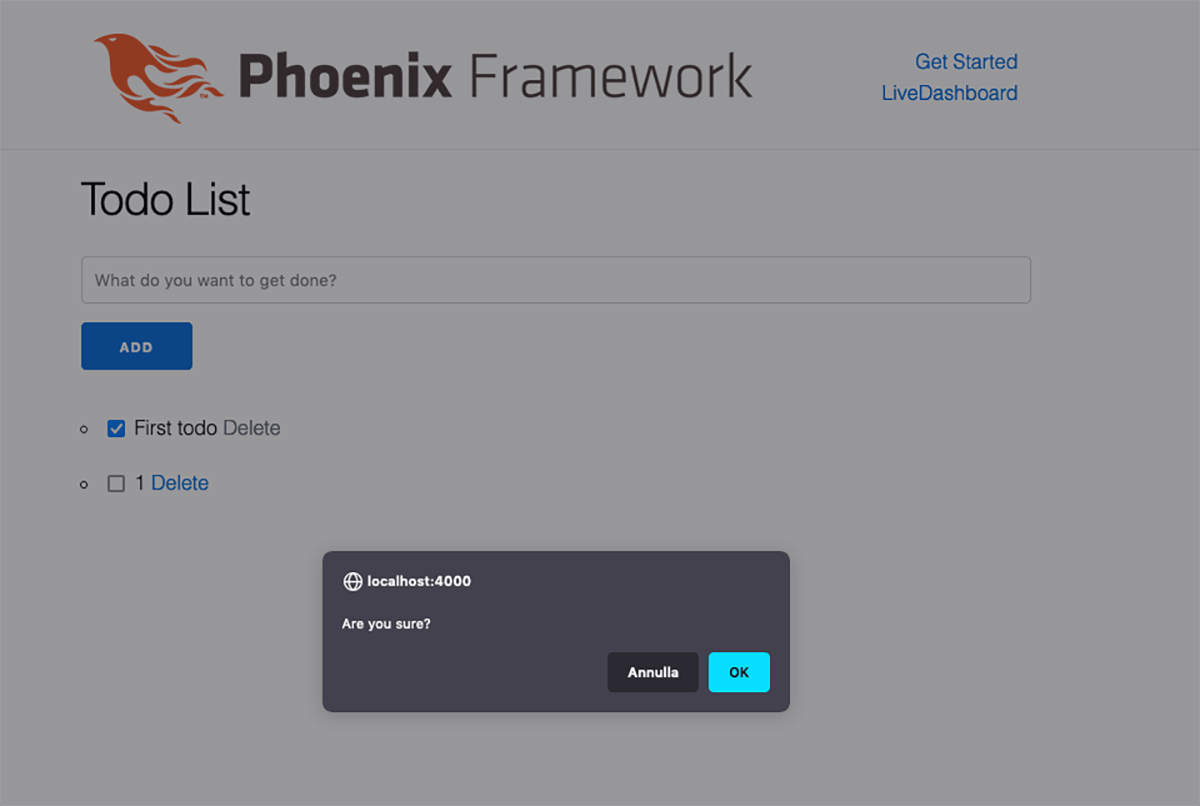
We want to add a delete button to every item in the list. Let's update the TodoLive component as follows:
# lib/todo_app_web/live/todo_live.ex
defmodule TodoAppWeb.TodoLive do
...
def render(assigns) do
~L"""
...
<ul>
<%= for todo <- @todos do %>
<li>
...
<%= link 'Delete',
to: '#',
phx_click: 'delete-todo',
phx_value_todo_id: todo.id,
data: [confirm: 'Are you sure?'] %>
</li>
<% end %>
</ul>
...
"""
end
# ...
def handle_event("delete-todo", %{"todo-id" => id}, socket) do
todo = Todos.get_todo!(id)
{:ok, _} = Todos.delete_todo(todo)
{:noreply, fetch(socket)}
end
# ...
endClicking the link calls the handler delete-todo with the parameter todo.id. The task with that id is then fetched and deleted from the database.

Editing an item
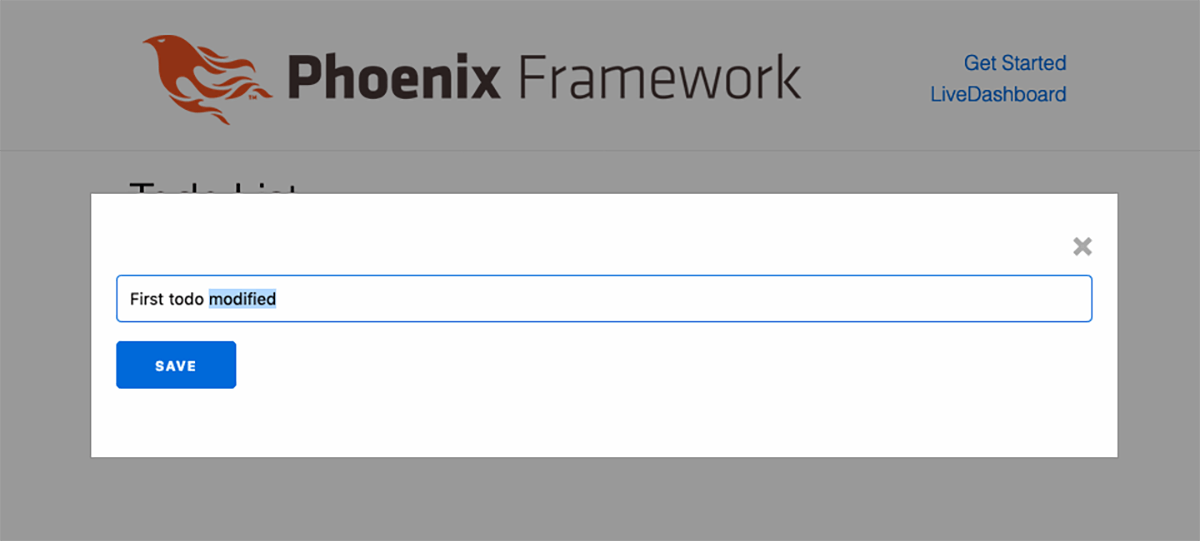
In this section we want to be able to edit an item by clicking the Edit button and show the input in a modal.
First, let's create a generic helper, live_modal:
# lib/todo_app_web/live/live_helpers.ex defmodule TodoAppWeb.LiveHelpers do import Phoenix.LiveView.Helpers def live_modal(socket, component, opts) do path = Keyword.fetch!(opts, :return_to) modal_opts = [id: :modal, return_to: path, component: component, opts: opts] live_component(socket, TodoAppWeb.ModalComponent, modal_opts) end end
Let's include the new helper in view_helpers:
# lib/todo_app_web.ex defmodule TodoAppWeb do # ... defp view_helpers do quote do # ... import TodoAppWeb.LiveHelpers # ... end end # ... end
Let's create the ModalComponent component:
defmodule TodoAppWeb.ModalComponent do
use TodoAppWeb, :live_component
def render(assigns) do
~L"""
<div id='<%= @id %>' class='phx-modal'
phx-capture-click='close'
phx-window-keydown='close'
phx-key='escape'
phx-target='#<%= @id %>'
phx-page-loading
>
<div class='phx-modal-content'>
<%= live_patch raw('×'), to: @return_to, class: 'phx-modal-close' %>
<%= live_component @socket, @component, @opts %>
</div>
</div>
"""
end
def handle_event("close", _, socket) do
{:noreply, push_patch(socket, to: socket.assigns.return_to)}
end
endNext, let's create the component FormComponent
# lib/todo_app_web/live/form_component.ex
defmodule TodoAppWeb.FormComponent do
use TodoAppWeb, :live_component
alias TodoApp.Todos
def render(assigns) do
~L"""
<%= form_for @changeset,
'#',
[
id: 'todo-form',
phx_target: @myself,
phx_change: 'validate',
phx_submit: 'save'
], fn f -> %>
<%= text_input f,
:title,
placeholder: 'Create a todo' %>
<%= error_tag f, :title %>
<%= submit 'Save', phx_disable_with: 'Saving...' %>
<% end %>
"""
end
def update(%{todo: todo} = assigns, socket) do
changeset = Todos.change_todo(todo)
{:ok,
socket
|> assign(assigns)
|> assign(:changeset, changeset)}
end
def handle_event("validate", %{"todo" => params}, socket) do
changeset =
%TodoApp.Todos.Todo{}
|> Todos.change_todo(params)
|> Map.put(:action, :validate)
{:noreply, assign(socket, changeset: changeset)}
end
def handle_event("save", %{"todo" => todo_params}, socket) do
case Todos.update_todo(socket.assigns.todo, todo_params) do
{:ok, _todo} ->
{:noreply,
socket
|> put_flash(:info, "Todo updated successfully")
|> push_redirect(to: socket.assigns.return_to)}
{:error, %Ecto.Changeset{} = changeset} ->
{:noreply, assign(socket, changeset: changeset)}
end
end
endLet's add the get_todo function:
# lib/todo_app/todos.ex defmodule TodoApp.Todos do # ... def get_todo(id), do: Repo.get(Todo, id) # ... end
Let's update the component as follows:
# lib/todo_app_web/live/todo_live.ex
defmodule TodoAppWeb.TodoLive do
# ...
def render(assigns) do
~L"""
...
<ul>
<%= for todo <- @todos do %>
<li>
...
<%= live_patch 'Edit',
to: Routes.live_path(@socket, TodoAppWeb.TodoLive, %{edit: todo.id}) %>
</li>
<% end %>
</ul>
<%= if @show_edit_modal do %>
<%= live_modal @socket,
TodoAppWeb.FormComponent,
id: @todo.id,
title: 'Edit',
action: @live_action,
todo: @todo,
return_to: Routes.live_path(@socket, TodoAppWeb.TodoLive) %>
<% end %>
"""
end
# ...
def handle_params(%{"edit" => id}, _uri, socket) do
todo = Todos.get_todo(id)
case todo do
nil ->
{:noreply,
socket
|> put_flash(:info, "Todo not found")}
_ ->
{:noreply,
socket
|> assign(:show_edit_modal, true)
|> assign(:todo, todo)}
end
end
def handle_params(_params, _uri, socket) do
{:noreply, fetch(socket)}
end
# ...
defp fetch(socket) do
socket
|> assign(:changeset, Todos.change_todo(%TodoApp.Todos.Todo{}))
|> assign(:todos, Todos.list_todos())
|> assign(:show_edit_modal, false)
end
end
Filtering list items
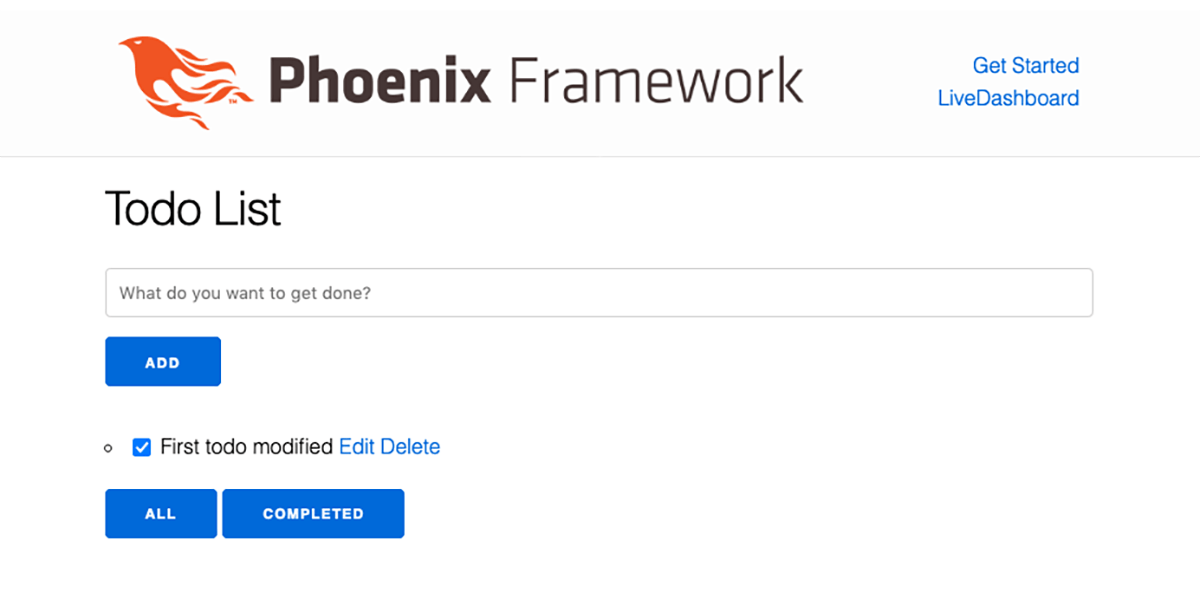
In this step we want to filter the items that have been completed.
Let's add the following query to Todos:
defmodule TodoApp.Todos do
  # ...
  def list_completed_todos do
    from(t in Todo, where: t.completed) |> Repo.all
  end
  # ...
end
Let's update the TodoLive component:
# lib/todo_app_web/live/todo_live.ex
defmodule TodoAppWeb.TodoLive do
# ...
def render(assigns) do
~L"""
...
</ul>
<footer>
<%= live_patch 'All',
to: Routes.live_path(@socket, TodoAppWeb.TodoLive),
class: 'button' %>
<%= live_patch "Completed",
to: Routes.live_path(@socket, TodoAppWeb.TodoLive, %{filter: 'completed'}),
class: "button" %>
</footer>
<%= if @show_edit_modal do %>
...
<% end %>
"""
end
# ...
def handle_params(%{"filter" => filter}, _uri, socket) do
{:noreply,
socket
|> assign(:todos, Todos.list_completed_todos())
|> assign(:filter, filter)
}
end
def handle_params(_params, _uri, socket) do
{:noreply, fetch(socket)}
end
# ...
endLet's take a closer look at the second link, live_patch "Completed" ....
Inspecting the DOM, we can see that the generated href is /filter=completed.
When navigation is redirected, the component picks up any parameters from the URL query string by calling the handle_params function. In our case, when the parameters include filter, the function handle_params(%{"filter" => filter}, ...) is called, which updates the socket's todo list so it only contains completed ones.
The second function, handle_params(_params, _uri, socket), is the fallback for when the query contains a parameter we don't handle.

Reordering items
Now we want to be able to drag an item to change its position. First, we need to add the following attribute to the Todo table: position.
$ mix ecto.gen.migration AddPositionToTodos
Let's update the migration file:
defmodule TodoApp.Repo.Migrations.AddPositionToTodos do use Ecto.Migration def change do alter table(:todos) do add :position, :integer, default: 0 end end end
Let's update the changeset and schema:
# lib/todo_app/todos/todo.ex defmodule TodoApp.Todos.Todo do # ... schema "todos" do # ... field :position, :integer # ... end ... def changeset(todo, attrs) do # ... |> cast(attrs, [:title, :completed, :position]) # ... end end
Let's check the new attribute from the terminal:
$ $ iex -S mix
> alias TodoApp.Todos
TodoApp.Todos
> Todos.get_todo!(1)
[debug] QUERY OK source="todos" db=17.6ms decode=1.1ms queue=2.0ms idle=1895.4ms
SELECT t0."id", t0."title", t0."completed", t0."position", t0."inserted_at", t0."updated_at" FROM "todos" AS t0 WHERE (t0."id" = $1) [1]
%TodoApp.Todos.Todo{
  __meta__: #Ecto.Schema.Metadata<:loaded, "todos">,
  completed: true,
  id: 1,
  inserted_at: ~N[2021-07-09 11:05:48],
  position: 0,
  title: "First todo modified",
  updated_at: ~N[2021-07-09 15:37:53]
}
To enable drag and drop, we need to install the library sortablejs. From the terminal:
$ cd assets && yarn add sortablejs && cd ..
Let's create the following file:
// assets/js/init_sortable.js
import Sortable from "sortablejs"
export const InitSortable = {
mounted() {
const callback = list => {
this.pushEventTo(this.el.dataset.targetId, "sort", { list: list })
}
this.init(callback)
},
init(callback) {
const targetNode = this.el
const sortable = new Sortable(targetNode, {
onSort: evt => {
const nodeList = targetNode.querySelectorAll("[data-sortable-id]")
const list = [...nodeList].map((element, index) => (
{
id: element.dataset.sortableId,
position: index
}
))
callback(list)
}
})
}
}Let's update the following file:
// assets/js/app.js
// ...
import {LiveSocket} from "phoenix_live_view"
import {InitSortable} from "./init_sortable"
// ...
let Hooks = {
InitSortable: InitSortable
}
// ...
// sostituiamo liveSocket con:
let liveSocket = new LiveSocket(
"/live",
Socket,
{
hooks: Hooks,
params: {_csrf_token: csrfToken}
}
)Let's update the todos query so items are fetched sorted by position:
# lib/todo_app/todos.ex defmodule TodoApp.Todos do # ... def list_todos do Todo |> order_by(asc: :position) |> Repo.all() end # ... end
Let's update the TodoLive component:
# lib/todo_app_web/live/todo_live.ex
defmodule TodoAppWeb.TodoLive do
# ...
def render(assigns) do
~L"""
...
<ul phx-hook='InitSortable' id='items' data-target-id='#items'>
<%= for todo <- @todos do %>
<li data-sortable-id=<%=todo.id %>>
...
"""
end
# ...
def handle_event("sort", %{"list" => list}, socket) do
list
|> Enum.each(fn %{"id" => id, "position" => position} ->
Todos.get_todo!(id)
|> Todos.update_todo(%{"position" => position})
end)
{:noreply, socket}
end
# ...
endRefactor: reusing components
Notice that the form and events in the TodoLive component are almost identical to those in the FormComponent component. With a few small tweaks, we can reuse the latter to cover both creating and updating a todo.
First, let's update the TodoLive component as follows:
# lib/todo_app_web/live/todo_live.ex
defmodule TodoAppWeb.TodoLive do
# ...
def render(assigns) do
~L"""
<!-- ... -->
<!-- Eliminiamo il vecchio form ... -->
<!-- ... -->
<%= live_component @socket,
TodoAppWeb.FormComponent,
id: 'todo-form',
action: :new,
todo: @todo,
return_to: Routes.live_path(@socket, TodoAppWeb.TodoLive) %>
<!-- ... -->
<%= if @show_edit_modal do %>
<%= live_modal @socket,
TodoAppWeb.FormComponent,
id: @todo.id,
title: 'Edit',
action: :edit,
todo: @todo,
return_to: Routes.live_path(@socket, TodoAppWeb.TodoLive) %>
<% end %>
"""
end
# ...
# Eliminiamo l'handle 'add-todo' e 'validate'
# ...
# Modifichiamo la fetch
defp fetch(socket) do
# ...
|> assign(:todo, %TodoApp.Todos.Todo{})
# ...
end
endInside the live_component we added the new parameter action to distinguish between saving a new item and updating an existing one. In the first case, the todo will be %TodoApp.Todos.Todo{}, that is, an empty todo. It is initialized inside the function mount.
Now let's update the TodoForm component to handle both cases:
defmodule TodoAppWeb.FormComponent do
# ...
# Modifichiamo l'handle_event save
def handle_event("save", %{"todo" => todo_params}, socket) do
save_todo(socket, socket.assigns.action, todo_params)
end
defp save_todo(socket, :new, todo_params) do
case Todos.create_todo(todo_params) do
{:ok, _todo} ->
{:noreply,
socket
|> push_redirect(to: socket.assigns.return_to)}
{:error, %Ecto.Changeset{} = changeset} ->
{:noreply, assign(socket, changeset: changeset)}
end
end
defp save_todo(socket, :edit, todo_params) do
case Todos.update_todo(socket.assigns.todo, todo_params) do
{:ok, _todo} ->
{:noreply,
socket
|> put_flash(:info, "Todo updated successfully")
|> push_redirect(to: socket.assigns.return_to)}
{:error, %Ecto.Changeset{} = changeset} ->
{:noreply, assign(socket, changeset: changeset)}
end
end
endThe socket assigns hold the action value, which helps us call the right function to perform the create or update.
PubSub
In this step we want to notify all connected users of any changes to the todo list.
Let's update the todos.ex file as follows:
# lib/todo_app/todos.ex
defmodule TodoApp.Todos do
# ...
alias TodoApp.PubSub
@topic inspect(__MODULE__)
def subscribe do
Phoenix.PubSub.subscribe(PubSub, @topic)
end
# ...
def create_todo(attrs \\ %{}) do
# ...
|> notify({:todo, :created})
end
def update_todo(%Todo{} = todo, attrs) do
# ...
|> notify({:todo, :updated})
end
def delete_todo(%Todo{} = todo) do
# ...
|> notify({:todo, :deleted})
end
# ...
defp notify({:ok, result}, event) do
Phoenix.PubSub.broadcast(PubSub, @topic, {TodoApp.Todos, event, result})
{:ok, result}
end
defp notify({:error, reason}, _), do: {:error, reason}
endThe @topic holds the module name as a string, in this case "TodoApp.Todos". In the notify function, we use the broadcast function to send a message of the form {:todo, <action>} to all currently active connections.
Let's update the TodoLive component:
# lib/todo_app_web/live/todo_live.ex
defmodule TodoAppWeb.TodoLive do
# ...
def mount(_params, _session, socket) do
Todos.subscribe()
{:ok, fetch(socket)}
end
# ...
def handle_info({Todos, {:todo, action} = event, _result}, socket) do
{:noreply, assign(socket, :todos, Todos.list_todos())}
end
endWhen the component receives the broadcast message, it runs handle_info, which updates the todo list. Of course, this version has a small flaw: what happens if one user deletes an item while someone else is editing it? The system tries to update an item that no longer exists and gets an error like this:
[debug] QUERY OK db=1.7ms queue=2.8ms idle=1152.4ms
UPDATE "todos" SET "title" = $1, "updated_at" = $2 WHERE "id" = $3 ["prova", ~N[2021-07-16 10:17:20], 34]
[error] GenServer #PID<0.611.0> terminating
** (Ecto.StaleEntryError) attempted to update a stale struct:
Conclusions
In this article we saw how to build an application using the mechanisms of Phoenix LiveView. We also worked with hooks, showing how to make the application talk to a JavaScript library, in this case sortablejs.
Note that the application wasn't split into backend and frontend. LiveView renders the DOM, keeps it correctly updated and handles events. In this sense, there's no need for a JS framework such as React: the application state lives inside the server process.


