

How to use React with Webpacker and Rails 5.2
User experience has changed a lot in recent years, bringing new complexities and challenges. Today, users expect much richer, more sophisticated interfaces: real-time data, asynchronous communication, effects on page elements and much more.
Luckily, a range of JavaScript libraries make these behaviors easy to implement.
In this article we'll focus on React for the front end and Ruby on Rails for the back end. To make integration easier we'll use a few tricks, such as Webpacker.


Getting started
To create a React application, you need to add the Webpacker library to your Rails project. Webpacker's goal is to make it easy to use the JavaScript pre-processor and webpack bundler inside Rails. You can use it alongside the Rails asset pipeline, letting the latter handle images and sass/scss compilation.
Installing and configuring Webpack
To add the library to the Gemfile, just run:
$ bundle add webpacker
Then we can install webpacker with:
$ bundle exec rails webpacker:install

    create config/webpacker.yml
Copying webpack core config
    create config/webpack
    create config/webpack/development.js
    create config/webpack/environment.js
    create config/webpack/production.js
    create config/webpack/test.js
Creating JavaScript app source directory
    create app/javascript
    create app/javascript/packs/application.js
Copying binstubs
    exist  bin
    create bin/webpack
    create bin/webpack-dev-server
Once it's done, we'll have:
- a
webpacker.ymlconfiguration file; - configurations for the various environments (development, production and test);
- an
app/javascript/packsdirectory containing theapplication.jsfile; - a few executables in
bin.
In action
First, we need to create a new controller with an action, for example pages#home, with the command:
$ rails generate controller pages home
Next, we configure the Rails router by setting the default URL:
# config/routes

# ...
root to:"pages#home"
# ...
Let's edit the application layout:
# app/views/layouts/application.html.erb
...
<%= javascript_pack_tag ’application’ %>
...
This includes the pre-built application-{hash}.js file in our layout. To build the JavaScript files in the app/javascript/packs folder, you need to run the bin/webpack-dev-server command.
Running bin/webpack-dev-server and bundle exec rails server, if the setup worked, we should see the message "Hello World from Webpacker" in the browser console.

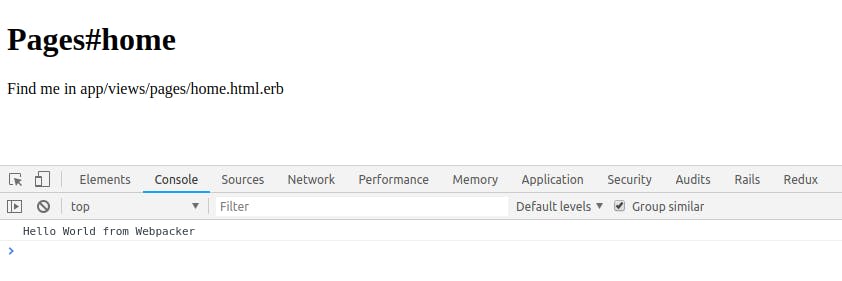
This message is printed by the file app/javascript/packs/application.js
Configuring React
To install and configure React, just run:
$ bundle exec rails webpacker:install:react

Copying babel.config.js to app root directory
    force  babel.config.js
Copying react example entry file to app/javascript/packs
    create  app/javascript/packs/hello_react.jsx
Updating webpack paths to include .jsx file extension
    insert  config/webpacker.yml
Installing all react dependencies
    run yarn add \
        react react-dom \
        @babel/preset-react \
        prop-types \
        babel-plugin-transform-react-remove-prop-types from "."
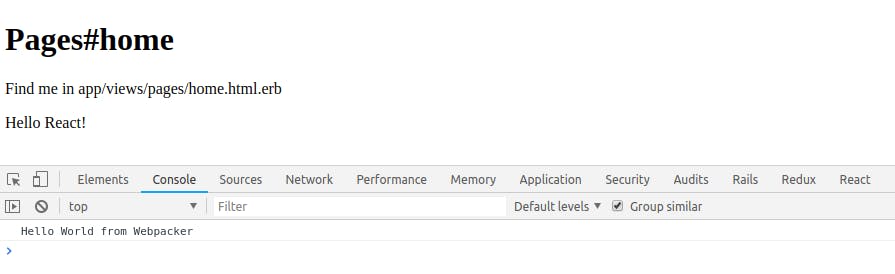
The install script automatically creates the hello_react.jsx file in the app/javascript/packs/ folder.
import React from 'react'
import ReactDOM from 'react-dom'
import PropTypes from 'prop-types'

const Hello = props => (
  <div>Hello {props.name}!</div>
)

Hello.defaultProps = {
  name: 'David'
}

Hello.propTypes = {
  name: PropTypes.string
}

document.addEventListener('DOMContentLoaded', () => {
  ReactDOM.render(
    <Hello name="React" />,
    document.body.appendChild(document.createElement('div')),
  )
})
And in the view
home
we add the new "pack":
# app/views/pages/home.html.erb

...
<%= javascript_pack_tag 'hello_react' %>
...

Compiling webpack assets
You can serve the assets generated by webpack in two ways:
Development: using the executable:
bin/webpack-dev-serverIn this mode a server runs (at http://localhost:3035/) and serves the files without writing them to disk. This mode supports hot reload.
- Production: we use the command
bundle exec rails assets:precompileThis way the build is served from thepublic/packs/jsdirectory.
If neither the server nor the public/packs folder is available, the assets will be compiled anyway.
Processing by PagesController#home as HTML
  Rendering pages/home.html.erb within layouts/application
  Rendered pages/home.html.erb within layouts/application (0.5ms)
[Webpacker] Compiling…
[Webpacker] Compiled all public/packs
You can access environment variables in two ways: by passing them as parameters or by using a .env file (recommended).
In the first case, we'll have:
FOO=hello BAR=world ./bin/webpack-dev-server
In the app we can access environment variables via process.env:
console.log(process.env.FOO)
In the second case, we can add the dotenv library to our package.json. Then we need to update the webpacker configuration:
// config/webpack/environment.js

...
const { environment } = require('@rails/webpacker')
const webpack = require('webpack')
const dotenv = require('dotenv')

const dotenvFiles = [
  `.env.${process.env.NODE_ENV}.local`,
  '.env.local',
  `.env.${process.env.NODE_ENV}`,
  '.env'
]
dotenvFiles.forEach((dotenvFile) => {
  dotenv.config({ path: dotenvFile, silent: true })
})

environment.plugins.prepend('Environment', new webpack.EnvironmentPlugin(JSON.parse(JSON.stringify(process.env))))

module.exports = environment
See the official documentation for implementation details.
Conclusion
This library makes integrating JavaScript frameworks (React, Vue, Angular, etc.) extremely easy, "modernizing" your application's frontend.
Enjoyed this guide? Follow our blog for new tutorials every month!


